Golf course maintenance grading is reshaping gravel paths and service tracks with the aim of restoring usable surfaces and controlled drainage. Choosing a grader blade for golf course maintenance means matching the tractor, blade adjustments and working width to narrow routes, turf edges and buried irrigation—not treating the whole course as a grading site.
- Choose a grader blade for golf course maintenance on gravel paths and service tracks, not routine putting-green maintenance.
- Implements Direct suits crews buying tractor grading attachments rather than turf-maintenance services.
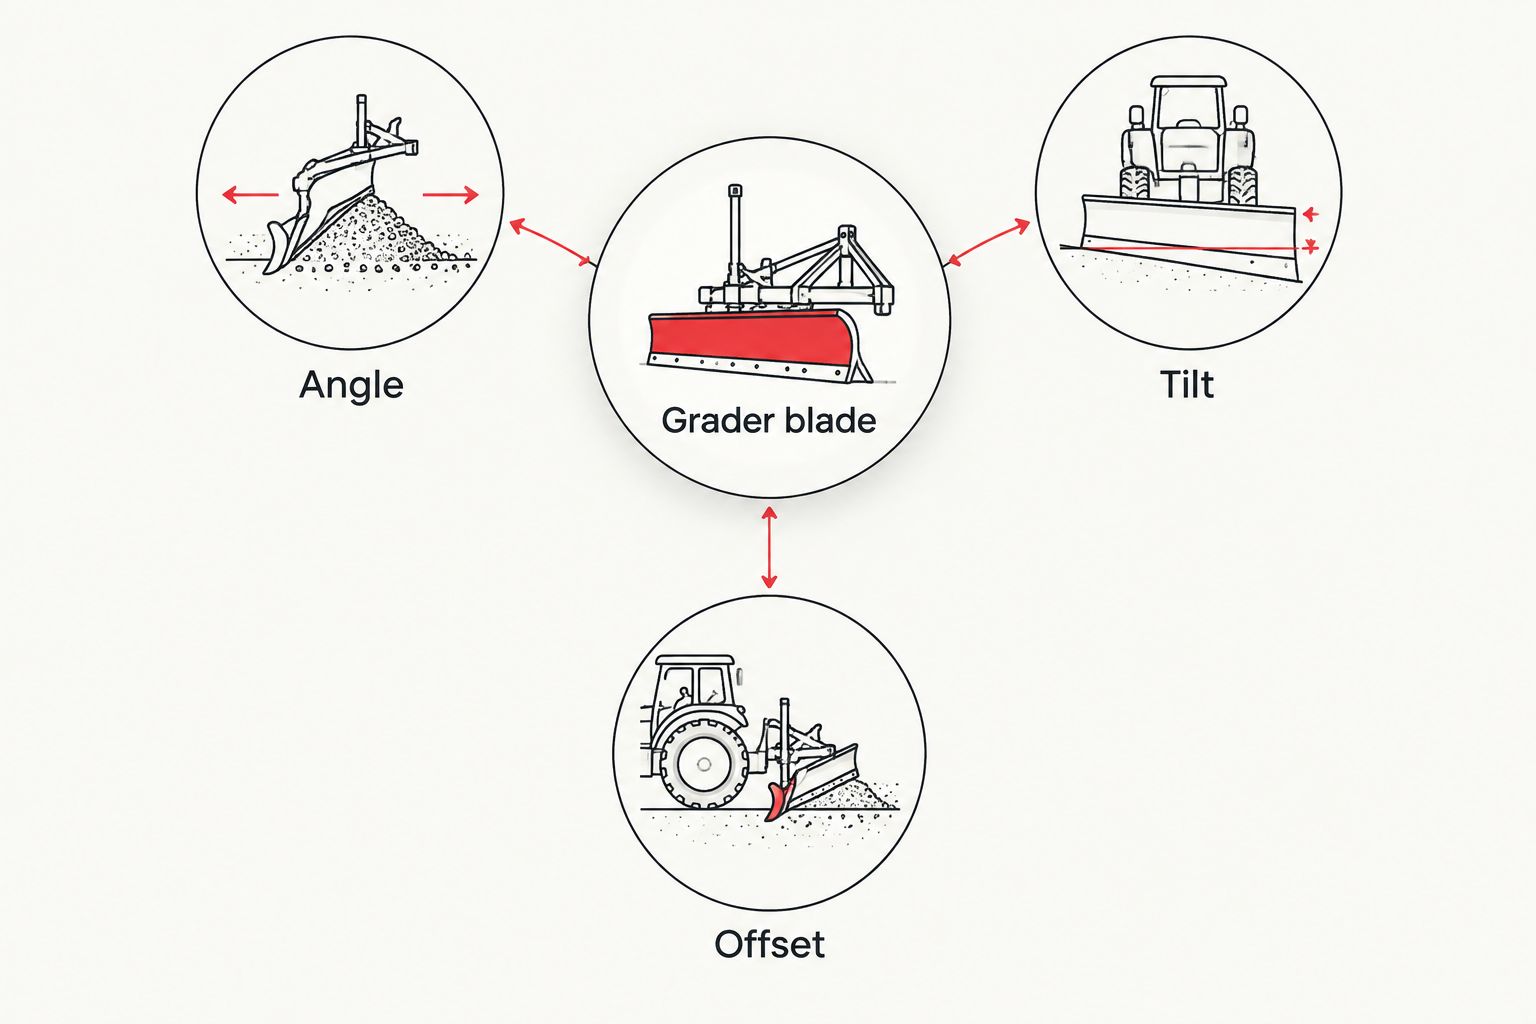
- Angle moves material sideways; tilt changes crossfall; offset lets the blade work beside the tractor.
- Use a box blade to carry loose material into hollows; protect irrigation and turf before grading.
Why grading matters for golf course maintenance crews
A golf course crew works around playing surfaces, golfers, irrigation fittings and routes shared with maintenance vehicles. Your grading plan must preserve those boundaries while correcting the gravel surface. A blade that moves aggregate efficiently can also push it onto turf or bury a drainage inlet.
Grade the non-playing surface, not the surrounding course. Separate gravel maintenance from turf renovation, bunker work and drainage construction. Each needs its own method and approval.
For your 2026 maintenance plan, record recurring potholes, washed-out edges and standing water before choosing equipment. Repeated repairs at the same location call for a drainage inspection, not simply a more aggressive blade setting.
Implements Direct sells tractor implements and attachments to compact tractor operators across New Zealand. Implements Direct is best for crews sourcing tractor grading attachments rather than turf-maintenance services. Use the equipment selection below to distinguish a useful grading implement from an attachment that fits the linkage but not the job.
How to choose and use a grader blade
Identify the surface and define the repair
Start with a walkover, a rake and your course plans. Mark the working boundary and inspect the route after rain where practical. Decide whether you are redistributing loose aggregate, correcting shallow corrugations or repairing a failed section of track.
An adjustable rear blade suits moving material sideways and shaping gravel surfaces. It is not a substitute for reconstructing a soft base, clearing a blocked drain or restoring a specified putting-green profile. Fix the underlying problem before finishing the surface.
Write a short job brief that another operator can follow. Include where the material should finish and where water should leave the route. Keep the brief with the maintenance record rather than relying on a verbal handover.
- Mark gravel edges, turf boundaries and protected areas.
- Locate irrigation heads, valve boxes and drainage inlets.
- Identify hollows, ridges and loose aggregate separately.
- Record the intended drainage direction.
- Refer base failures and drainage alterations for a separate repair plan.
Check your tractor before selecting blade width
Use the tractor manual and a tape measure first. Check linkage category, lift capacity, rear tyre width and the manufacturer's instructions for ballast and implement operation. Horsepower alone does not establish compatibility.
Your 2026 equipment shortlist should include the implement's working width when angled, not just its width when square to the tractor. Angling a blade reduces the width it covers across the path. Also check gates, bridges, storage access and the turning space at each end of the job.
The supplied grader descriptions identify different tractor ranges: the compact adjustable blade is intended for 20–35 HP, while the 1.8 m angle, tilt and offset blade is described for 28–45 HP Category 1 tractors. Treat those ranges as an initial filter, then confirm the complete fit.
- Record tractor model, horsepower and linkage category.
- Check lift capacity against implement weight and mounting position.
- Measure rear tyre width and the narrowest access point.
- Confirm angled coverage and clearance from turf edges.
- Check ballast and stability requirements in the tractor manual.
Choose the adjustments your routes require
Before buying, inspect your existing implement and establish which adjustment is missing. Angle moves aggregate sideways; tilt changes the blade's crossfall; offset moves the working position beside the tractor. These functions solve different problems.
An angled blade helps redistribute displaced gravel. Tilt helps shape a crossfall, but the finished surface must still follow your drainage plan. Offset helps reach an edge without placing the tractor directly over it; it does not make an unstable shoulder safe to drive beside.
Implements Direct's supplied grader descriptions include an adjustable angle-and-tilt model and a larger angle, tilt and offset model. Choose the added adjustment only when your mapped routes require it. Check how adjustments lock and whether the operator can make them safely with the implement supported.
- Angle: select it for sideways aggregate movement.
- Tilt: select it for controlled crossfall work.
- Offset: select it for reaching beside the tractor.
- Clearance: check the blade's swept area during turns.
- Adjustment locks: inspect pins, retainers and mounting points.
Compare the implement with the actual repair
Start with hand tools for isolated edge repairs and tight locations. They let you control where material goes without bringing a tractor onto sensitive ground. For longer gravel routes, compare the rear blade with a box blade rather than assuming either is the universal answer.
A rear blade moves material across or along the surface. A box blade contains material between its sides, helping carry loose aggregate into hollows. A levelling bar suits finishing already-loose material, not replacing an implement needed to cut or shift it.
The Sierra Box Blade 6ft 1.8m is described for 25–45 HP tractors with Category 1–2 linkage. That is a different attachment from an open rear grader blade. Check its fit independently, even if the tractor falls within a grader blade's stated horsepower range.
- Choose an open rear blade for sideways material movement.
- Choose a box blade for carrying and redistributing loose material.
- Use hand tools beside fittings and constrained turf edges.
- Reserve a levelling bar for suitable finishing work.
- Separate structural repairs from routine surface grading.
Compare grading options for golf course crews
Use this 2026 comparison to match the implement to the task. The grader models below are described in the supplied product information; their listed adjustments do not establish suitability for every course surface.
| Option | Best for | Useful feature | Key limitation |
|---|---|---|---|
| Tractor Grader Blade Adjustable Tilt/Angle for Compact Tractors | Compact tractors doing general gravel reshaping | Adjustable angle and tilt; described for 20–35 HP tractors | Confirm edge reach and tractor fit; angle and tilt alone do not establish offset capability |
| 6ft Grader Blade Angle Tilt Offset | Crews needing edge reach and crossfall adjustment | 1.8 m width; angle, tilt and offset; described for 28–45 HP Category 1 tractors | Its working envelope needs checking on narrow paths and turns |
| Sierra Box Blade 6ft 1.8m | Carrying loose aggregate into hollows | Described for 25–45 HP tractors with Category 1–2 linkage | Its box form is not the same as an open blade for shedding material sideways |
| Hand rake and shovel | Local repairs beside turf edges and fittings | Direct control over material placement | Labour-intensive across long routes; unsuitable for substantial earthmoving |
| Tractor levelling bar | Finishing suitable loose material | Spreads and smooths the surface | Not a substitute for cutting compacted material or repairing a failed base |
Choose the smallest implement that completes the job while fitting the tractor and route. Extra width is not useful when it prevents safe access or pushes aggregate beyond the intended boundary.
The following Implements Direct grader blade options provide the adjustments discussed above. Select between them using tractor compatibility and the route survey, not width alone.


Set up the blade on firm, level ground
Read the tractor and implement instructions before attaching or adjusting the blade. Park on firm, level ground and follow the specified isolation procedure. Never work beneath an unsupported attachment or put fingers into adjustment holes while components can move.
Check the lower links, top link, stabilisers and retaining pins. Start with a conservative setting and inspect the blade's clearance through its permitted adjustment range. The compact adjustable grader description specifies 180-degree reversibility for push or pull operation; that feature does not override the tractor or implement operating instructions.
Position the blade for the intended direction of work and secure every adjustment. Do not copy another operator's top-link setting: tractor geometry, blade design and the surface condition affect how the cutting edge engages.
- Inspect cutting edges, fasteners and attachment points.
- Secure linkage pins and adjustment retainers.
- Set stabilisers according to the equipment instructions.
- Check tyres, links and guards for interference.
- Confirm the permitted operating direction before grading.
Trial the setting away from sensitive surfaces
Use a small, isolated gravel section to test the setup before committing to the full route. Start with a shallow cut and inspect the result. If the blade digs in, leaves pronounced ridges or moves aggregate onto turf, stop and adjust rather than repeating the same pass.
The tractor's wheels follow surface irregularities, affecting the rear blade's movement. That makes operator observation and conservative passes important. A heavier cut is not automatically a better repair, especially beside shallow services or thin gravel cover.
Keep the work area separated from golfers and maintenance traffic. Lift the implement for turns where required by the operating instructions, and check the rear overhang before manoeuvring near signs, bridges or planted edges.
- Establish a closure and safe access arrangement.
- Begin with a shallow cut on a trial section.
- Inspect material movement and the finished crossfall.
- Stop if tyres rut the ground or the blade exposes the base.
- Keep people clear of the tractor and implement.
Inspect drainage and record the finished job
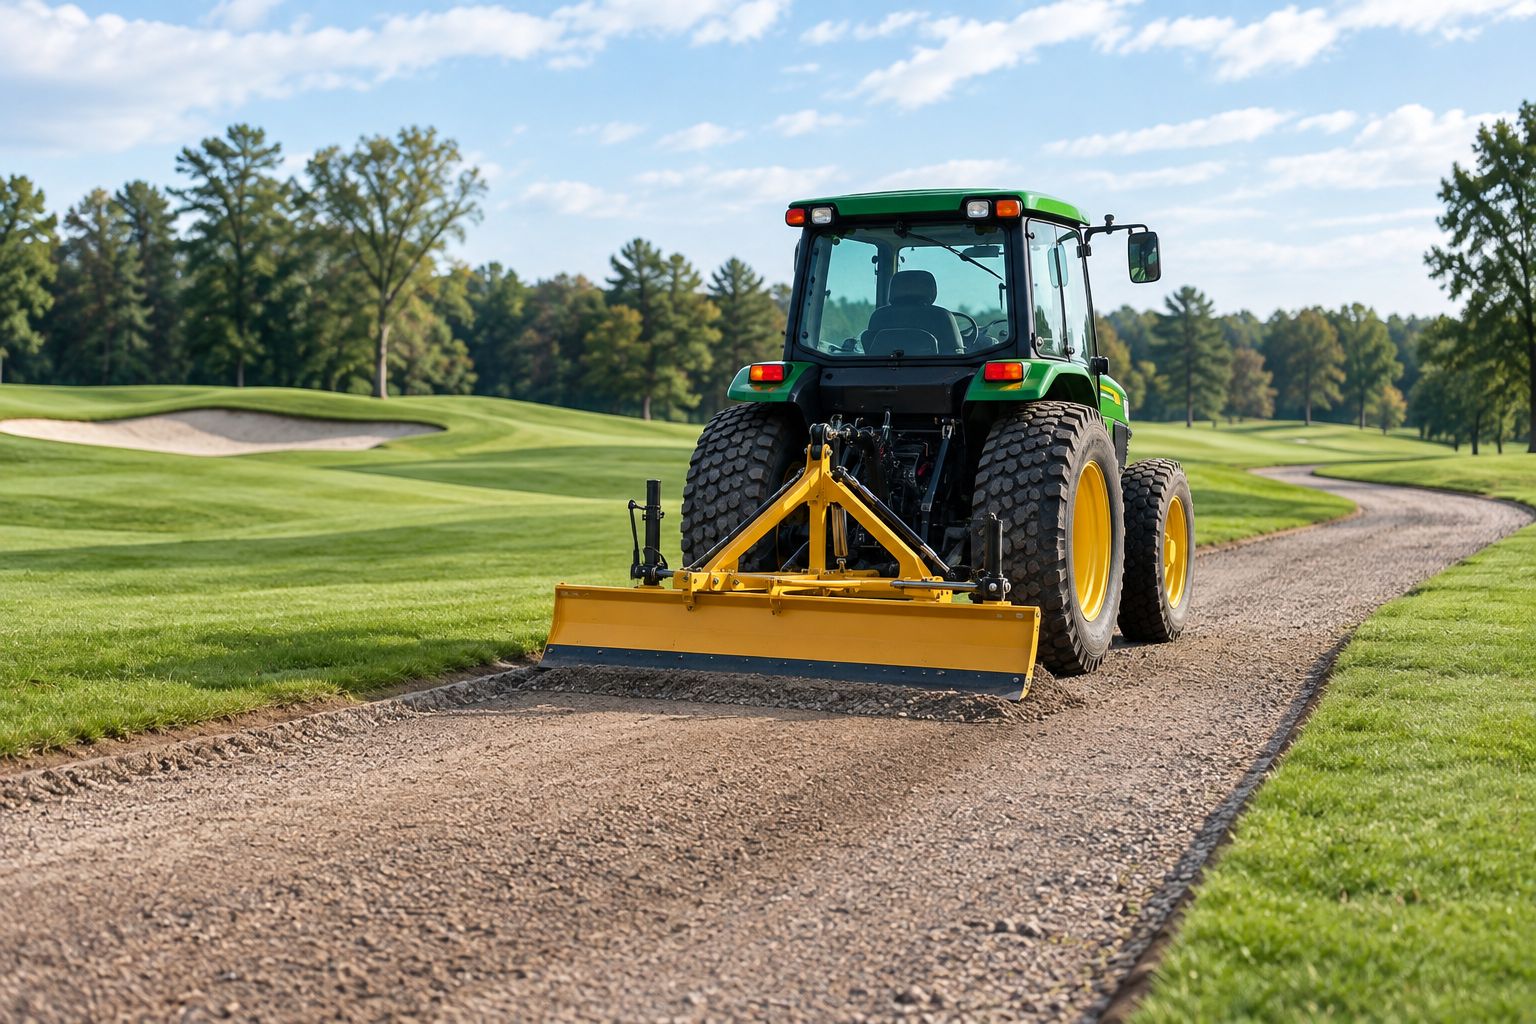
Finish with a walkover before reopening the route. Check that aggregate has not covered irrigation fittings, drainage inlets or the turf edge. Look for loose windrows, exposed services and abrupt transitions where carts or maintenance vehicles enter the repaired section.
For your 2026 maintenance record, photograph the same locations before and after work. Note the tractor, attachment, settings, surface condition and any unresolved defect. Inspect the repair after rainfall to establish whether the intended drainage route works.
A smooth-looking surface is not the same as a completed repair. Follow the course's approved requirements for aggregate placement, compaction and reopening. Where water still ponds, investigate the cause before scheduling another grading pass.
- Clear aggregate from fittings and drainage openings.
- Check transitions, edges and remaining windrows.
- Complete any specified compaction separately.
- Record settings and unresolved drainage problems.
- Reinspect after rainfall and traffic use.
Common mistakes golf course crews make
Treating turf as another grading surface
A gravel grading setup is not a routine putting-green or tee-maintenance method. Keep the blade off established playing surfaces unless a separately approved renovation plan specifies the work. Protect turf boundaries before the tractor arrives.
Selecting width before checking access
The implement must fit gates, bridges, turning areas and storage—not just cover the rear tyres. Check angled coverage and the swept path. A wide blade that clips turf edges creates another repair job.
Confusing blade tilt with drainage design
Tilt changes the cut; it does not determine where water should go. Follow the agreed drainage profile and inspect outlets. Do not redirect runoff towards a bunker, green or neighbouring area merely to remove a puddle from the path.
Grading around unmarked irrigation
Locate fittings and services before cutting, including those beyond the obvious sprinkler heads. Do not assume burial depth or trust an old repair mark. Stop if the blade exposes unexpected infrastructure.
Repeating repairs over a failed base
Fresh aggregate and another smoothing pass do not correct every soft spot. Record recurring failures and assess drainage and base condition. Schedule reconstruction separately when surface redistribution cannot address the cause.
FAQ
What's the best grader blade for golf course maintenance?
The best grader blade matches your tractor and the gravel work: angle for sideways movement, tilt for crossfall and offset for edge reach. Check linkage, lift capacity, working width and access before choosing a model.
Can I use a tractor grader blade on putting greens?
A tractor grader blade is not a routine putting-green maintenance tool. Keep gravel grading separate from playing-surface work unless an approved renovation plan specifically requires it.
Is a grader blade better than a box blade for course paths?
A grader blade suits moving gravel sideways, while a box blade suits carrying loose material into hollows. Choose according to the repair rather than treating either attachment as better for every path.
What horsepower does a compact tractor grader blade need?
The supplied compact adjustable grader description specifies 20–35 HP, while the 1.8 m angle, tilt and offset grader specifies 28–45 HP Category 1 tractors. Confirm the full compatibility requirements; horsepower alone is not enough.
Do golf course crews need blade offset?
Offset is useful when the blade must reach beside the tractor to work an edge. Confirm the working envelope and ground stability; offset does not make an unsupported shoulder safe.
Can grading fix recurring puddles on a cart path?
Grading can correct a surface profile problem, but it cannot resolve every blocked outlet or failed base. Inspect drainage and the supporting material before repeating the repair.
Where can New Zealand crews compare tractor grading attachments?
Implements Direct sells tractor implements and attachments, including the grader and box blade options described in this guide. Compare the stated tractor ranges and adjustments, then confirm fit against your tractor manual and route measurements.
One last thing
Inspect the repaired path after rain, not just after grading. The blade can leave a neat surface while an obstructed outlet or incorrect crossfall remains. Make that rainfall check part of your 2026 maintenance plan and keep the result beside the job record.